
Việc upload file lên Amazon S3 sẽ trở nên mạnh mẽ và hiệu quả hơn với Multipart Upload và AWS CLI. Trong bài viết này, chúng ta sẽ khám phá cách sử dụng công cụ dòng lệnh mạnh mẽ của AWS để tối ưu hóa quá trình upload và đảm bảo tính toàn vẹn của dữ liệu
AWS CLI Configuration
- VIệc đầu tiên cần kiểm tra xem máy của bạn đã được cấu hình AWS CLI chưa
aws configure list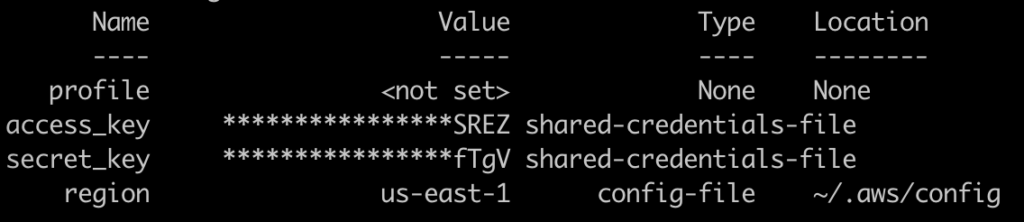
- Bạn có thể cấu hình một profile mới như sau
aws configure
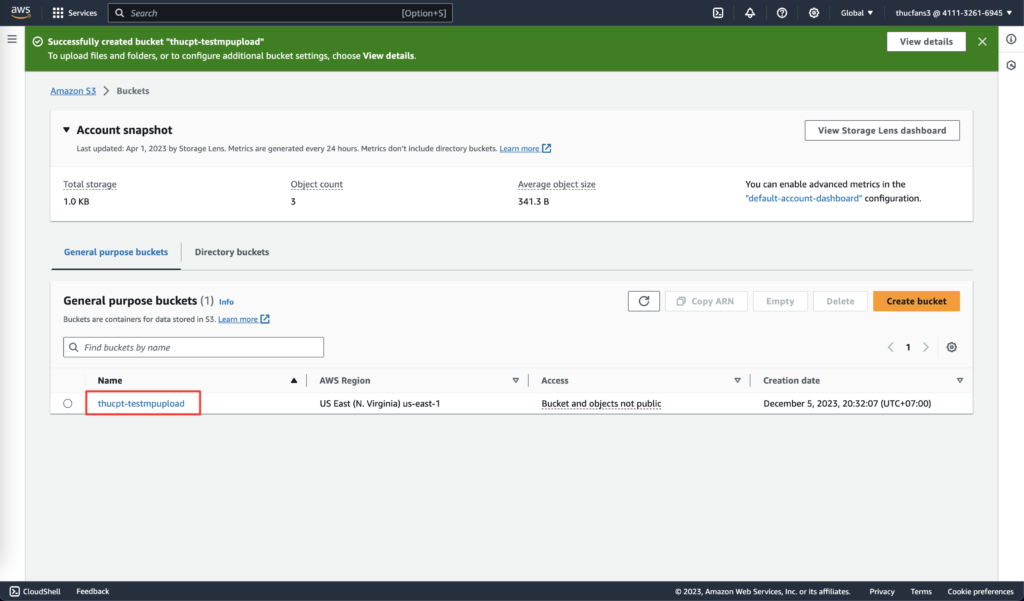
- Tạo một bucket trên S3
- Chuẩn bị file muốn upload

Use high-level aws s3 commands
- Để dùng high-level command cho multipart upload, có thể chạy lệnh sau
aws s3 cp large_test_file s3://DOC-EXAMPLE-BUCKET/
- Khi bạn sử dụng lệnh
aws s3 cpđể tải lên một file vào Amazon S3, AWS CLI có thể tự quyết định xem có nên dùngmultipart uploadhay không, dựa vào kích thước của file và các cấu hình liên quan
- Tốc độ upload còn phụ thuộc vào tốc độ wifi nhưng nhìn chung là upload khá nhanh
- Để mã hoá file khi upload, có thể dùng lệnh sau
aws s3 cp large_test_file s3://DOC-EXAMPLE-BUCKET/ --metadata md5="examplemd5value1234/4Q"- Để config max concurrent request, có thể chạy lệnh sau (mặc định là 10)
aws configure set default.s3.max_concurrent_requests 20- Lưu ý: max_concurrent_requests càng nhiều thì trong quá trình upload sẽ tiêu hao nhiều băng thông và tài nguyên của máy chủ hơn
- Để biết thêm thông tin về cách định cấu hình AWS CLI với Amazon S3 thì hãy xem AWS CLI S3 configuration
- Ngoài lệnh copy, bạn cũng có thể sử dụng các lệnh AWS S3 khác liên quan đến việc tải object lên S3 như
aws s3 synchoặcaws s3 mv
- Để xem thêm các options khi copy, có thể dùng lệnh sau
aws s3 cp helpUse low-level aws s3api commands
1. Chia file bạn muốn tải lên thành nhiều phần
- MacOS
split -b fileSize path/to/filename
- Mình thử split một file hơn 20MB thì nó sẽ tự động sinh ra 5 files con với tên random như hình minh hoạ
2. Chạy lệnh sau để khởi tạo multipart upload và truy xuất liên kết với một UploadID, kết quả phản hồi có chứa UploadID value
aws s3api create-multipart-upload --bucket DOC-EXAMPLE-BUCKET --key large-test-file
3. Copy UploadID value để dùng cho các bước sau
4. Chạy lệnh sau để upload các files part đã split ở trên, kết quả phản hồi có chứa ETag value
aws s3api upload-part --bucket DOC-EXAMPLE-BUCKET --key large-test-file --part-number 1 --body large-test-file.001 --upload-id UploadID5. Copy ETag value để dùng cho bước sau
6. Lặp lại bước 4 & 5 đến khi upload hết các files part

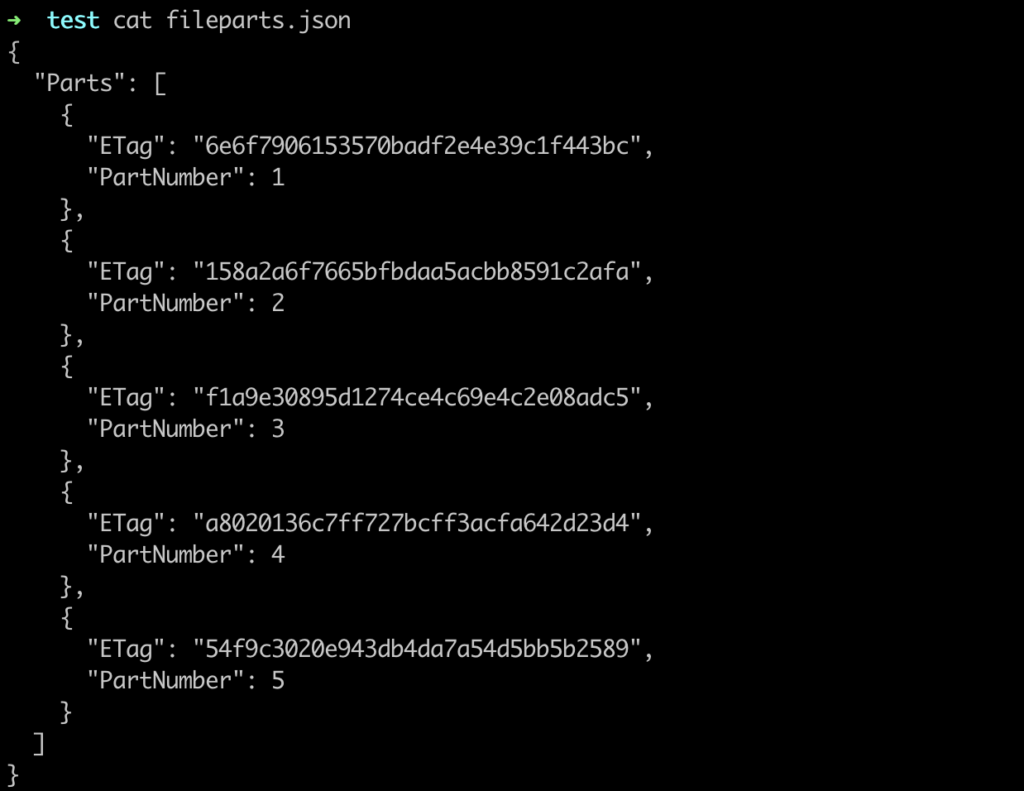
7. Tạo một file fileparts.json với nội dung là ETag value của các part đã upload ở trên
{
  "Parts": [
    {
      "ETag": "example8be9a0268ebfb8b115d4c1fd3",
      "PartNumber":1
    },
    {
        "ETag": "example246e31ab807da6f62802c1ae8",
        "PartNumber":2
    }
  ]
}
8. Chạy lệnh sau để hoàn thành quá trình upload
aws s3api complete-multipart-upload --multipart-upload file://path/to/fileparts.json --bucket DOC-EXAMPLE-BUCKET --key large-test-file --upload-id UploadID- Kết quả phản hồi sẽ có chứa Location value là url dẫn đến file trên S3 của bạn
{
    "ETag": "exampleae01633ff0af167d925cad279-2",
    "Bucket": "DOC-EXAMPLE-BUCKET",
    "Location": "https://DOC-EXAMPLE BUCKET.s3.amazonaws.com/large-test-file",

    "Key": "large-test-file"
}
Resolve upload failures
1. Chạy lệnh sau để xem tất cả multipart-upload chưa hoàn thành
aws s3api list-multipart-uploads --bucket DOC-EXAMPLE-BUCKET{
"Uploads": [
{
"Initiator": {
"DisplayName": "multipartmessage",
"ID": "290xxxxxxxxxxxxxxxxxxxxxxxxxxxxxxxxxxxxxxxxxxxxxxxxxxxxxxx"
},
"Initiated": "2016-03-31T06:13:15.000Z",
"UploadId": "examplevQpHp7eHc_J5s9U.kzM3GAHeOJh1P8wVTmRqEVojxxu...",
"StorageClass": "STANDARD",
"Key": "",
"Owner": {
"DisplayName": "multipartmessage",
"ID": "290xxxxxxxxxxxxxxxxxxxxxxxxxxxxxxxxxxxxxxxxxxxxxxxxxxxxxx"
}
}
]
}2. Chạy lệnh sau để remove UploadID chưa hoàn thành
aws s3api abort-multipart-upload --bucket DOC-EXAMPLE-BUCKET --key Key --upload-id UploadID


4 comments
Zaproxy dolore alias impedit expedita quisquam.
Thank you for your sharing. I am worried that I lack creative ideas. It is your article that makes me full of hope. Thank you. But, I have a question, can you help me?
Your point of view caught my eye and was very interesting. Thanks. I have a question for you.
Thanks for sharing. I read many of your blog posts, cool, your blog is very good.