What are “View Modifiers”?
Trong SwiftUI, view modifiers là một cách để thay đổi hoặc thiết lập hành vi cho một view cụ thể. Chúng là các cấu trúc nhẹ nhàng cho phép bạn thay đổi giao diện, hành vi hoặc bố cục của một view. Các bộ điều chỉnh view được áp dụng bằng cách sử dụng cú pháp dấu chấm và có thể được nối với nhau để thực hiện những sửa đổi phức tạp hơn.

View modifiers không chỉ cho phép bạn thay đổi hình dạng và hành vi của một view, mà còn cho phép bạn tạo ra những thay đổi phức tạp bằng cách nối chúng lại với nhau. Với SwiftUI, bạn có thể thay đổi font, màu sắc, khoảng trống, căn chỉnh, và nhiều tính năng khác của view chỉ bằng cú pháp đơn giản.

Ngoài ra, SwiftUI cung cấp các view modifier tích hợp sẵn, giúp bạn tiết kiệm thời gian và công sức trong việc tạo ra giao diện người dùng đẹp và hiệu quả. Hơn nữa, bạn cũng có thể tạo ra những bộ điều chỉnh tùy chỉnh phù hợp với yêu cầu cụ thể của ứng dụng của mình.
Trong SwiftUI, view modifiers là một cách hữu dụng để có thể đóng gói và tái sử dụng các hành vi và styles cho các view.
Bạn có thể làm điều này bằng cách tạo một struct ViewModifier mới với giao thức ViewModifier. Ở đây, mình tạo một struct CustomViewModifier và tuân thủ nó vào giao thức ViewModifier.
struct CustomViewModifier: ViewModifier {

    func body(content: Content) -> some View {
        content
    }

}
Bây giờ, bạn có thể thêm các modifier vào content này theo ý muốn. Mình sẽ thêm một số view modifier tích hợp sẵn để thêm border.
struct CustomViewModifier: ViewModifier {

    func body(content: Content) -> some View {
        content
            .padding()
            .cornerRadius(10)
            .overlay(
                RoundedRectangle(cornerRadius: 10)
                    .stroke(Color.black, lineWidth: 2)
            )
    }
}
Chúng ta có thể tùy chỉnh các thuộc tính của bộ điều chỉnh view như corner radius, border width, v.v.
struct CustomViewModifier: ViewModifier {

    var cornerRadius: CGFloat
    var borderColor: Color
    var borderWidth: CGFloat

    func body(content: Content) -> some View {
        content
            .padding()
            .cornerRadius(cornerRadius)
            .overlay(
                RoundedRectangle(cornerRadius: cornerRadius)
                    .stroke(borderColor, lineWidth: borderWidth)
            )
    }
}
Chúng ta có thể gọi trực tiếp custom modifier này hoặc bạn có thể đặt một tên cho nó bằng cách tạo extension từ View.
.modifier(CustomViewModifier(cornerRadius: 10,
                             borderColor: .black,
borderWidth: 2)) extension View{
//--Chúng ta có thể đặt tên cho custom modifer
func addBorder(cornerRadius: CGFloat,
borderColor: Color,
borderWidth: CGFloat) -> some View{
self.modifier(CustomViewModifier(cornerRadius: cornerRadius,
borderColor: borderColor,
borderWidth: borderWidth))
}
}Bây giờ hãy sử dụng modifier này trong view của bạn.
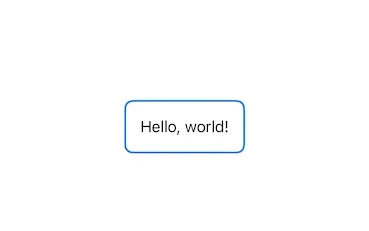
struct ContentView: View {
    var body: some View {
        VStack {
            Text("Hello, world!")
                .addBorder(cornerRadius: 8,
                           borderColor: Color.blue,
                           borderWidth: 2)
        }
    }
}
Kết quả chúng ta sẽ được như hình bên dưới:

Thêm một ví dụ custom modifier với Linear Gradient: Tạo một view modifier có background là linear gradient và có thể blur.
struct BlurWithLinearGradient: ViewModifier {
    let isBlur: Bool
    let cornerRadius: CGFloat

    func body(content: Content) -> some View {
        ZStack {
            if isBlur {
                content
                    .background(linearGradient())
                    .blur(radius: 3)
            }

            content
                .background(linearGradient())
        }
    }

    @ViewBuilder
    private func linearGradient() -> some View {
        LinearGradient(colors: [Colors.black, Colors.blue],
                       startPoint: .topLeading,
                       endPoint: .bottomTrailing)
            .overlay(
                RoundedRectangle(cornerRadius: cornerRadius)
                    .strokeBorder(.white.opacity(0.5), lineWidth: 1)
            )
            .clipShape(RoundedRectangle(cornerRadius: cornerRadius))
    }
}

extension View {
    func linearGradientBlur(isBlur: Bool = false,
                            cornerRadius: CGFloat = 15) -> some View {
        self.modifier(BlurWithLinearGradient(isBlur: isBlur,
                                             cornerRadius: cornerRadius))
    }
}
References:
https://developer.apple.com/documentation/swiftui/viewmodifier


1 comment
Your point of view caught my eye and was very interesting. Thanks. I have a question for you.